Your first site
Short answer: open Tenancy > Add New, leave the defaults and click Create Tenant. GrabWP creates a new WordPress site on the same install, with its own content and admin. Click Open site admin (1-click) to log in to it.
Needs: Free
How it works
GrabWP runs many separate websites from one WordPress install. Each one is called a site, or a "tenant" on some GrabWP screens. A site has its own posts, pages, media, users and admin area. By default, sites share the plugins and themes of the main site, so you update them once.
Step 1: check the server
Open Tenancy > Status and look at Plugin General. Fix any card that is not green with Auto Fix, or follow its fix steps. If you see a red notice at the top of wp-admin, fix it first. See Install GrabWP.
Step 2: create the site
Open Tenancy > Add New.
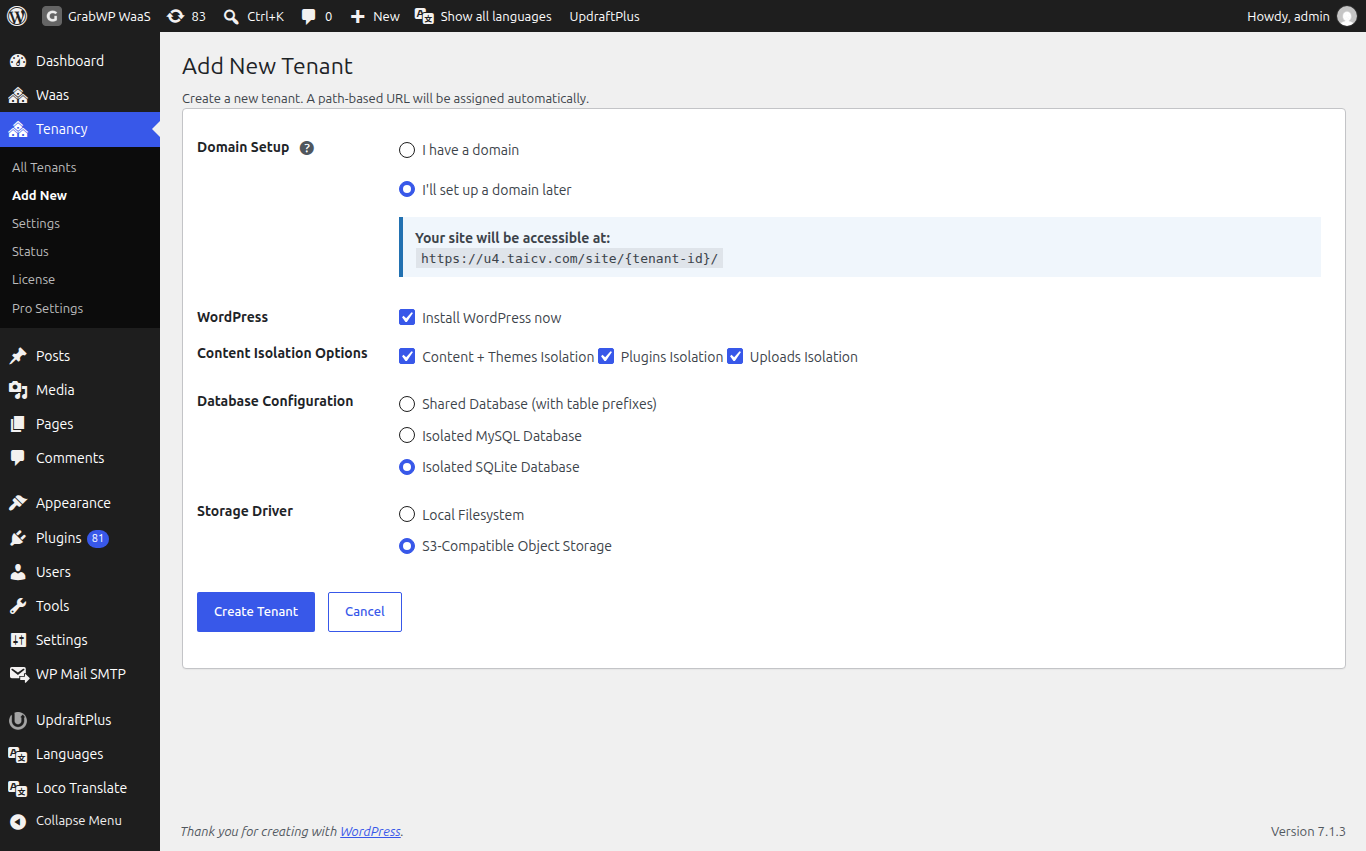
- Under Domain Setup, keep I'll set up a domain later if you do not have a domain ready. The screen shows the address the site will use, for example
example.com/site/plus the site ID. - Or choose I have a domain and type it without
http://orwww(for exampleclient1.com). - Leave Install WordPress now ticked.
- Click Create Tenant.
The fields you see depend on the routing mode. In Path mode there is no domain field. In Domain mode a domain is required. See Domains and DNS.
GrabWP gives the site a 6 character ID, creates its database tables and upload folder, and installs WordPress. The new site gets an administrator named after the site ID with a random password.
You never need that password. The 1-click Admin button logs you in. The password is shown once, so copy it only if you want a backup way in.
With Pro, the form also has Content Isolation Options, Database Configuration and (once S3 is set up) Storage Driver. The defaults come from Tenancy > Pro Settings, so you can leave them as they are. See Per-site plugins and themes and Database options.
Step 3: open the new site
After saving you see Site created: with the address, the Username and the Password. Click Open site admin (1-click).
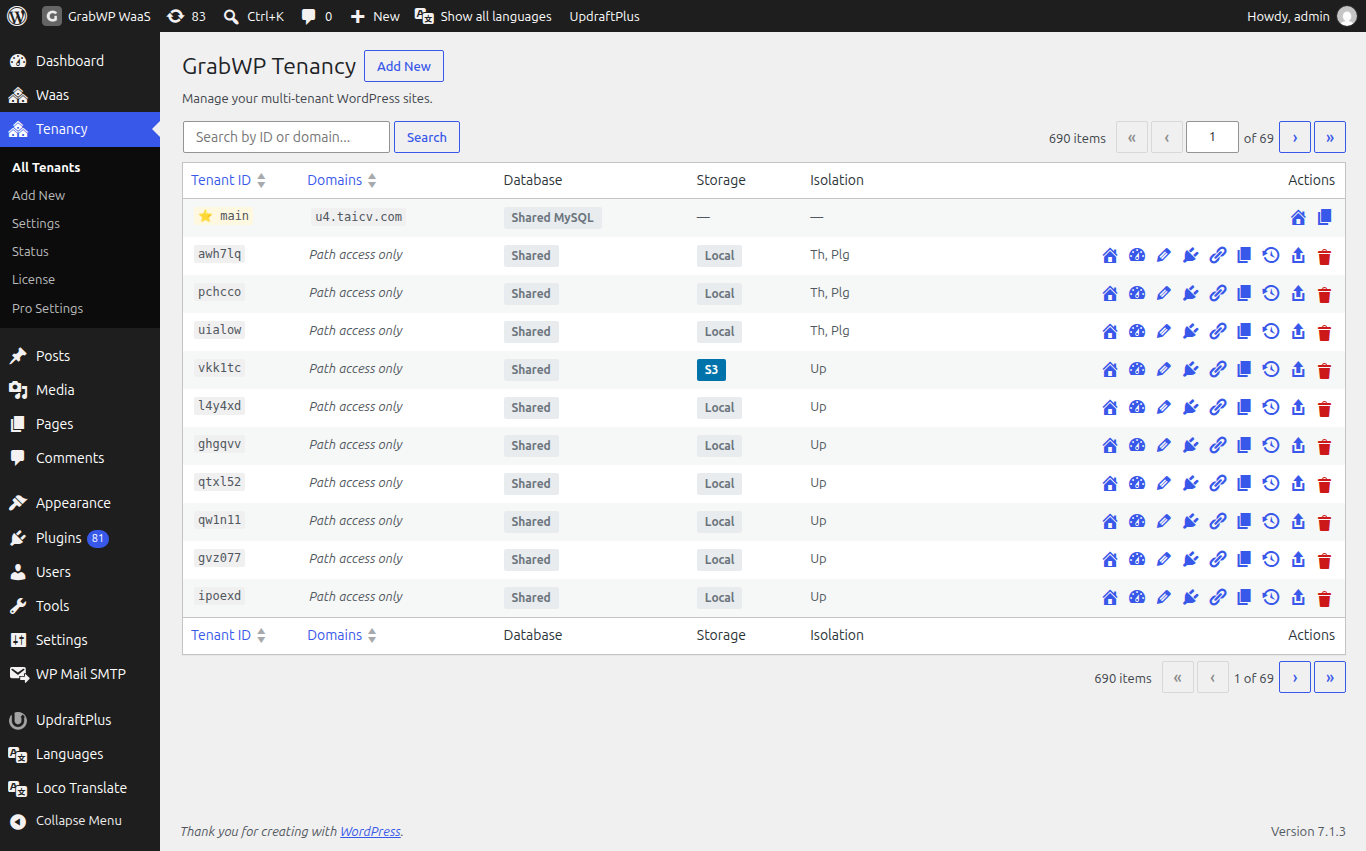
Later, open the site from Tenancy > All Tenants: find its row and click the Admin icon (dashboard icon). The login link works for 30 minutes. If it has expired, reload the list and click again. See Log in to a client site.
If the screen says The site was created but WordPress could not be installed automatically:, your server cannot call its own address. Click Finish install in browser and complete the normal WordPress install.
Step 4: check it works
- Click Visit Site on the row. You should see the new site, not the main site.
- If you used a domain, it must point to this server first. See Domains and DNS.
First day checklist
Run this once before you build sites for clients.
- Plugins are installed in order: GrabWP Tenancy, then Pro, then WaaS and add-ons if you use them.
- No GrabWP notice shows at the top of wp-admin.
- Tenancy > Status > Plugin General has no warning cards.
- On Nginx, the routing rules are in your server block. See Apache, LiteSpeed and Nginx.
- One test site opens on its address and its admin opens with the Admin icon.
- If you use Pro, your license shows as active on Tenancy > License.
- If you rely on scheduled backups or sell sites, set up a server cron job. See Scheduled jobs and server cron.
:::info If you sell sites With WaaS, customers create their own sites from your signup page, so you rarely use Add New yourself. Follow Set up WaaS after this checklist. :::