Set up WaaS
Short answer: install GrabWP Tenancy, then Pro, then WaaS, and follow the setup wizard. The wizard sets the web address of customer sites, activates your Pro license, picks defaults for new sites, creates your starter template and Free plan, and opens your signup page. Paid plans and payments come after.
Needs: Pro + WaaS
Before you start
Required
- A WordPress site (5.0 or newer, PHP 7.4 or newer) where you can install plugins and reach the files (FTP, SSH or the hosting file manager). Check versions in Tools > Site Health > Info > Server.
- A Pro license key. Activating it also lets you download the payment add-ons.
- HTTPS on your main site. Payment providers need it.
If customer sites get subdomains (for example shop.yoursaas.com)
-
A domain pointed at your server, plus a wildcard DNS record so every subdomain reaches it:
*.yoursaas.com A YOUR_SERVER_IP -
An SSL certificate that covers both
yoursaas.comand*.yoursaas.com. Many hosts offer Let's Encrypt.
After installing GrabWP Tenancy 1.1.15 or later, the Subdomains (wildcard) row of the Hosting setup card on Tenancy > Status tests the DNS record, the address and the certificate for you. See Hosting setup checks.
If customer sites use path URLs instead (for example yoursaas.com/site/site-name/), you need no extra DNS.
Recommended
- An SMTP plugin, such as WP Mail SMTP or FluentSMTP. Customers sign in with a code sent by email, and plain WordPress mail often lands in spam.
- A VPS or dedicated server if you can. It gives you control of DNS, SSL and PHP functions such as
symlink(). - An account with the payment provider you will use (see Payments). You can launch with a Free plan or a free trial first and add payments later.
Optional
- Cloudflare, if customers will connect their own domains with the Cloudflare SaaS (CNAME) mode. See Client custom domains.
- WooCommerce, if you want to take payments through your WooCommerce checkout.
Step 1: Install the three plugins
Install them in this order. Each one needs the one before it.
- GrabWP Tenancy (Free)
- GrabWP Tenancy Pro
- GrabWP Tenancy WaaS
For each ZIP file:
- Go to Plugins > Add New > Upload Plugin.
- Choose the ZIP and click Install Now, then Activate.
After the first plugin, a Tenancy menu appears (All Tenants, Add New, Settings, Status). After Pro, Tenancy also has Pro Settings and License. After WaaS, a Waas menu appears (Dashboard, Subscriptions, Domains, Templates, Settings).
If activation fails with a dependency error, activate the plugin before it first. While Pro or WaaS is installed but not active, a notice asks you to finish activating it, then run the setup wizard.
Step 2: Run the setup wizard
The wizard opens by itself the first time you activate GrabWP on a site with no customer sites. Later you can open it from:
- the Continue setup button on the notice "GrabWP: finish setup to get your first site running",
- Run setup wizard (or Resume setup wizard) at the top of Tenancy > Status. Since WaaS 1.1.25 this is the only button; the WaaS dashboard no longer has one.
The wizard saves each screen as you go. Exit setup pauses it; the steps you saved are kept and you can resume later. Back returns to the previous screen.
| Step | What you do |
|---|---|
| Welcome | The wizard checks your server and explains "How your website service works" (the five parts on How WaaS works). Click Continue. |
| Routing | Choose the web address of your sites: Path (no DNS needed) or Domain (a subdomain or your own domain, marked Recommended). You can change it later in Tenancy > Settings > Routing, which also lets sites use both a path and a domain. |
| License | Activate your Pro license. You can skip this and activate later under Tenancy > License, but add-on downloads need it. |
| Site defaults | Defaults for new sites: Choose each setting is selected and marked Recommended: you pick the database, plugins, themes and uploads. For plugins and themes the choices are Shared from the main site, Own themes, Own plugins and Own plugins and themes; on a fresh install Own plugins and themes and Own uploads folder are preselected and marked Recommended. Use the simple setup (each site gets its own uploads folder, plugins and themes are shared from the main site) keeps it to one screen. |
| Starter site | Create your starter site. Customers get a copy of this site when they sign up. Create a new one or pick an existing site. |
| Storefront | Three short screens: Your template (turn the starter site into a template: Template site, Template name, Template slug), Your Free plan (Free plan name, Description, Features, one per line), and Your signup page (Platform domain and Accent color, the color of buttons and links customers see). |
| Done | Manage sites (Open site admin (1-click), Visit site, All sites), Manage WaaS (Open template gallery, Test a signup (use a private window), WaaS dashboard), plus next steps: Connect payments, Paid plans and trials, More templates. |
The Platform domain is required unless customer sites use path URLs. With path URLs you can leave it empty.
On Your template (WaaS 1.1.25 or later):
- Template site lists each site by name, address and ID.
Greyed out sites are already templates and cannot be picked here.Use Manage them in WaaS > Templates for those. - Template slug is prefilled with a slug no other template uses (
starter-site, thenstarter-site-2and so on). If you type a slug that is taken, the step saysThat template slug is already used by another template. - If WordPress is not installed in the chosen site yet, the template is still saved, with the warning
The template was saved, but GrabWP could not confirm that WordPress is installed in that site. Open the site and check it before customers sign up.
WaaS creates the Signup, Dashboard, Templates and Pricing pages for you when it is activated, so after the wizard your signup page already works.
Before you build the starter site in detail, sign up once with the Free plan in a private browser window. If the site appears, the core setup works.
Step 3: Check the General settings
Open Waas > Settings > General. The wizard already filled most of it. Check:
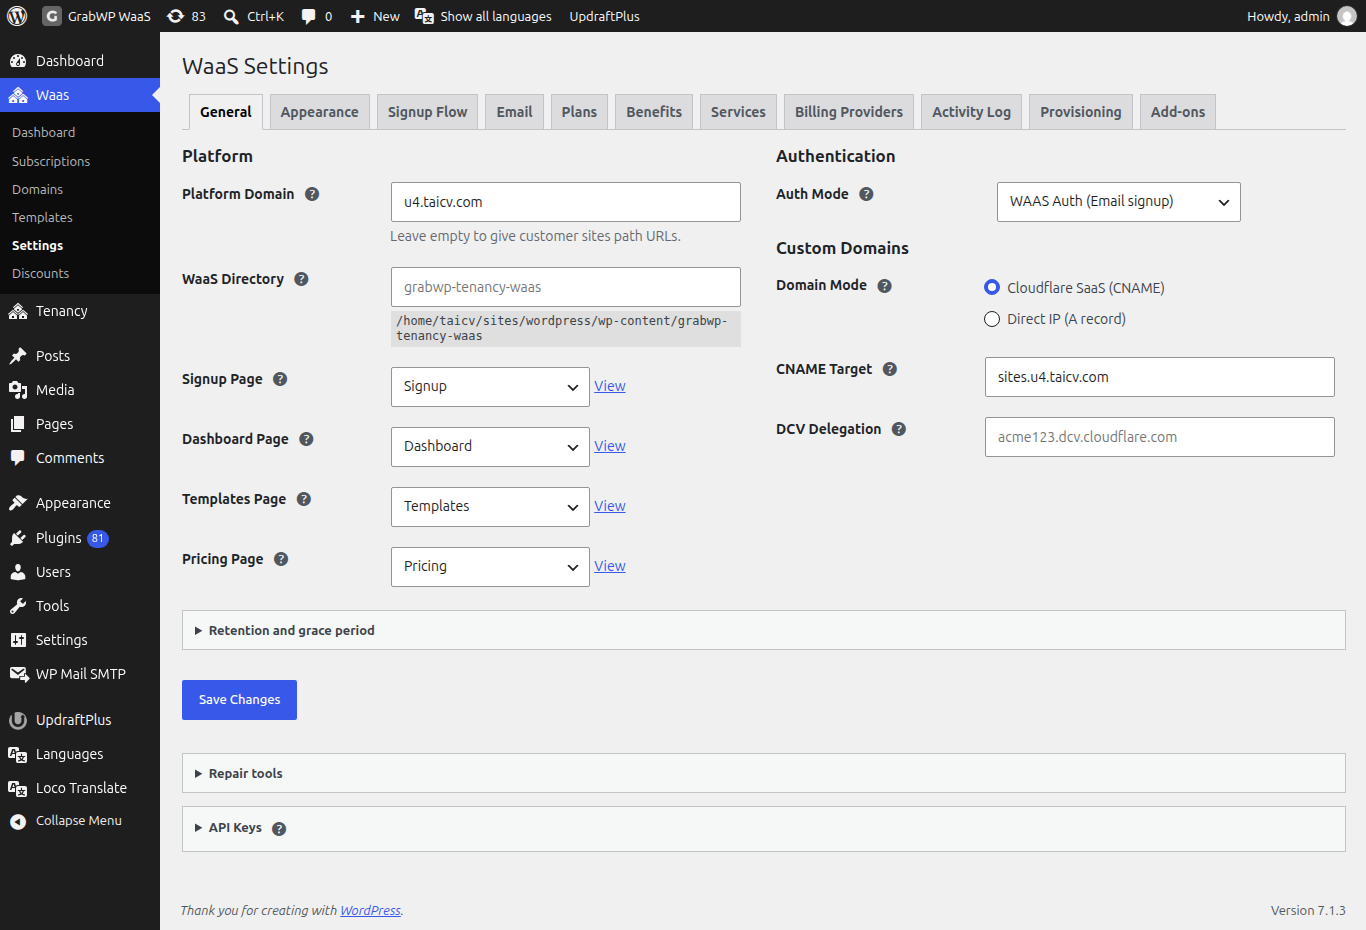
- Platform Domain matches the domain in your wildcard DNS (no
http://, no trailing slash). In path mode this row is hidden and the page says "Path mode: customer sites open at ... No DNS needed." - Signup Page, Dashboard Page, Templates Page and Pricing Page each point at a page. Each has a View link. If one is missing, open Repair tools and click Create/Repair Signup and Dashboard Pages (notice: Signup and Dashboard pages checked.).
- Auth Mode is WAAS Auth (Email signup) for self-service signups. The other choice, WordPress Auth (Login required), needs an existing WordPress login before a site is created.
- Domain Mode under Custom Domains is the mode you will use for customer domains. You can leave the targets empty until you accept custom domains. See Client custom domains.
- Under Retention and grace period, Grace Period (days) is how long a site stays online after a subscription ends (default 7). See Free trials and subscriptions.
Click Save Changes. The notice Settings saved. confirms it. Every field on this tab is listed on WaaS settings.
Step 4: Check the Pro defaults for new sites
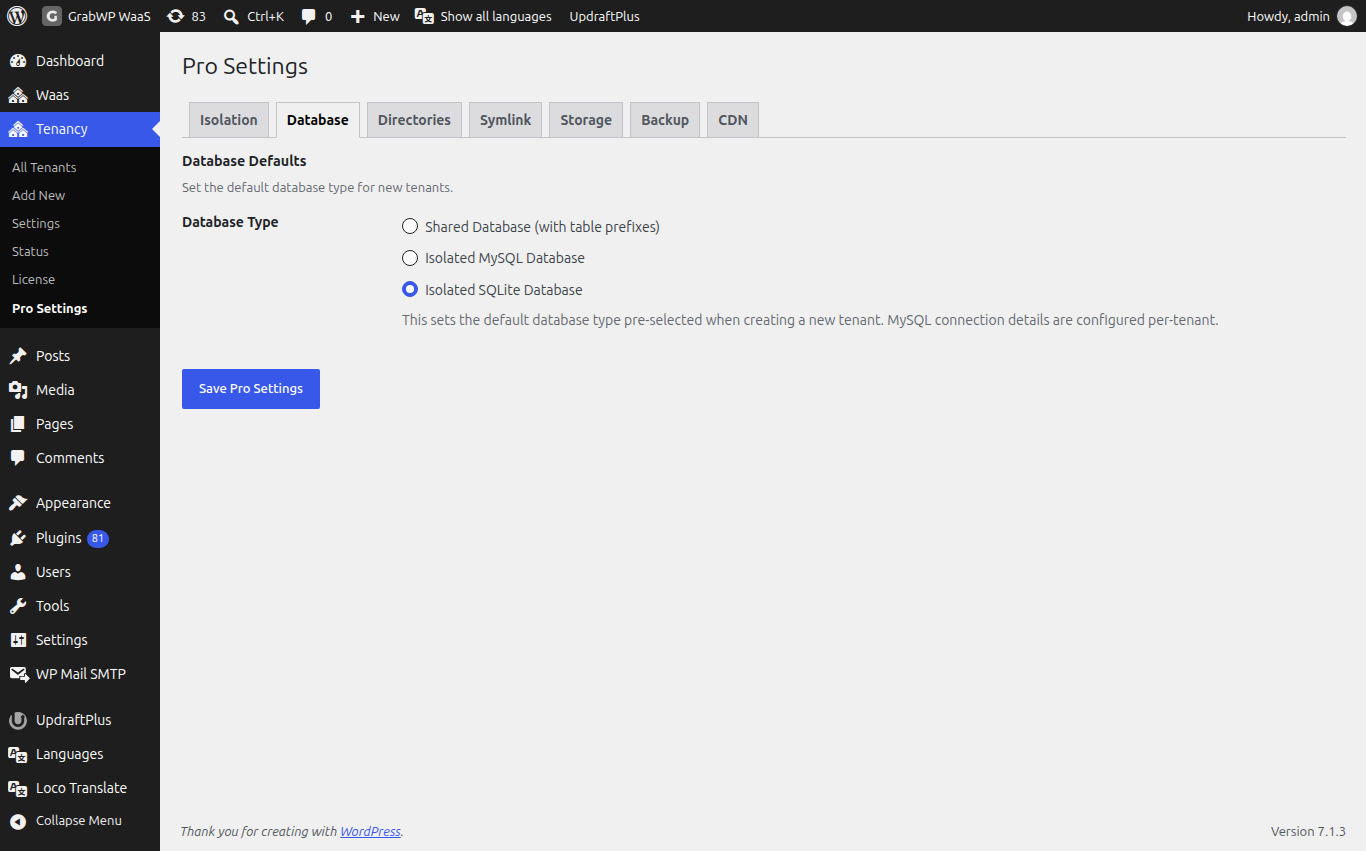
The wizard's Site defaults step wrote these. To change them, open Tenancy > Pro Settings. They apply to sites created from now on; existing sites do not change.
- Isolation tab: Level of isolation for new sites is Shared, Simple, Advanced or Custom. Simple (own uploads folder, shared plugins and themes) is where a fresh install starts and suits most website services: shared plugins use less disk and you update them once. Advanced gives each site its own plugins, themes and uploads.
- Database tab: Database Type is Shared Database (with table prefixes), Isolated MySQL Database or Isolated SQLite Database. With Isolated MySQL, the Default MySQL Connection fields (MySQL Host, MySQL Database, MySQL Username) pre-fill the create-site form.
- Directories tab: leave the fields blank to keep the default locations.
Leave Symlink, Storage, Backup and CDN at their defaults until you need them. Click Save Pro Settings after a change.
Step 5: Install payment add-ons (only for Stripe, Sepay or Xendit)
Polar.sh and WooCommerce need no add-on. For Stripe, Sepay or Xendit:
- Activate your Pro license first (Tenancy > License, Activate License).
- Open Waas > Settings > Add-ons.
- On the add-on card (for example GrabWP Tenancy Stripe), click Download ZIP.
- Install the ZIP with Plugins > Add New > Upload Plugin, then Activate.
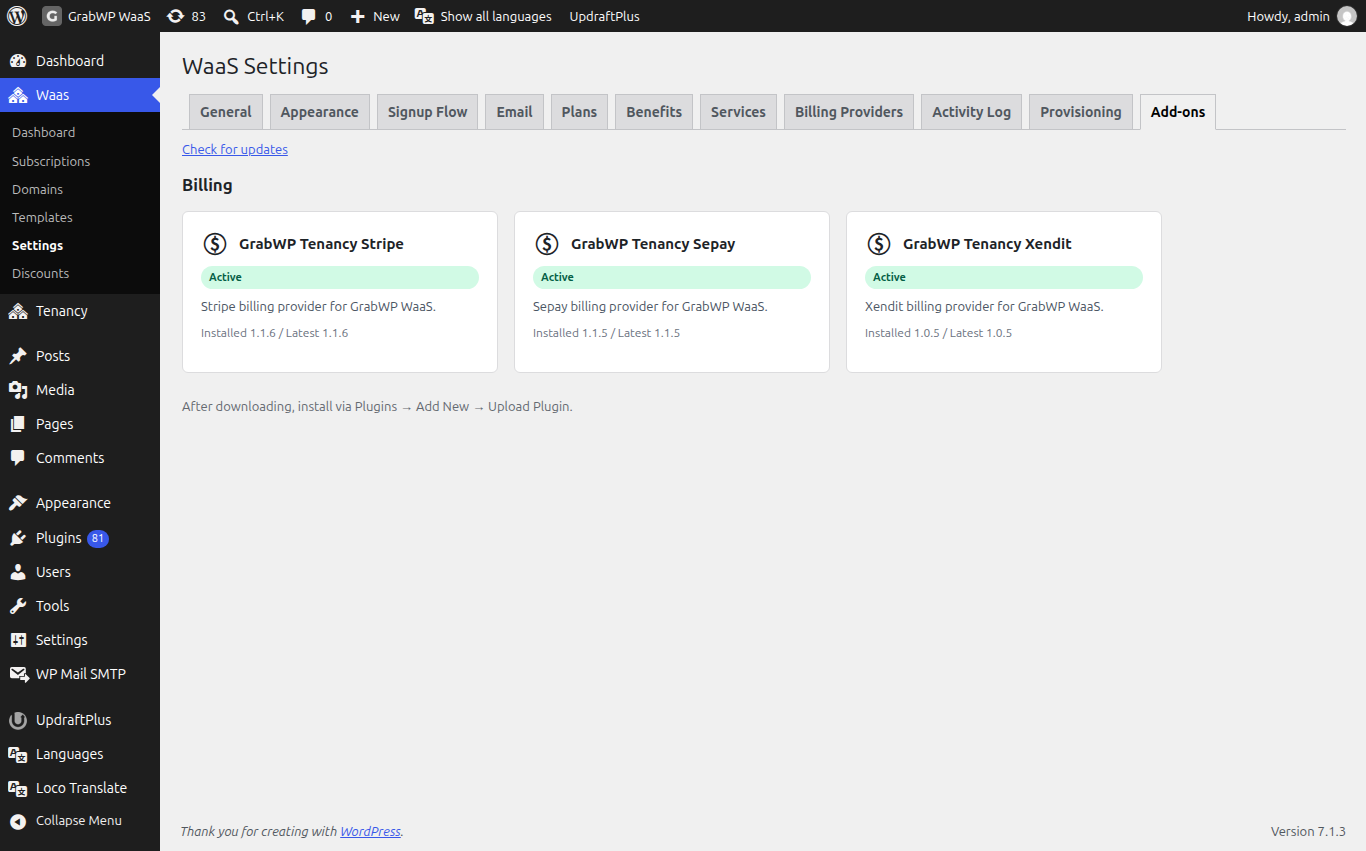
The card badges are explained on Benefits, services and add-ons. Then connect the provider on Payments.
Check that it works
-
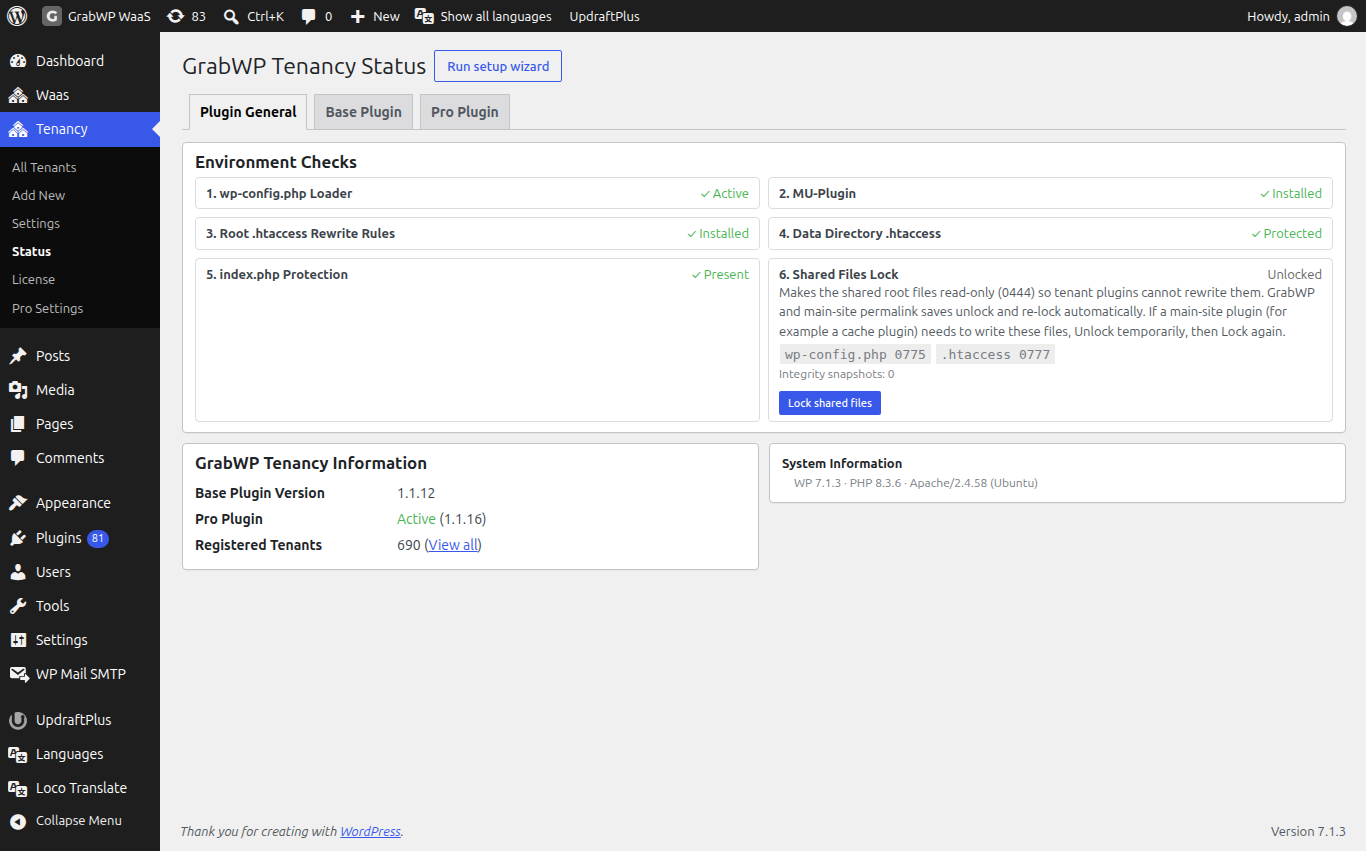
Tenancy > Status shows no problems. Fix anything it reports first.
-
Plugins lists GrabWP Tenancy, GrabWP Tenancy Pro and GrabWP Tenancy WaaS as active.
-
The wizard's Done screen lists your template as active and the Free plan as ready.
-
A test signup in a private window creates a site you can open.